


Heard about Node.js and Express but are confused where to start? Well, here you can find 3 easy steps to create and run Express application in Node.js on a Mac OS.
Step 1. Install Node.js and Node Package Manager (npm)
The first step is to install Node.js and Node Package Manager (npm). Mac’s package manager, Homebrew, can be used to install them by running the following command on the terminal.
![]()
Once brew has completed installing, verify that both components are present by running:
![]()
To get the version of the node by running:
![]()
To check the version of the npm. The versions may be slightly different for you depending on when you ran the command.
Step 2. Create Application Using Express Generator
Express is a minimal Node.js web application framework which allows you to organize your application in a MVC architecture. It has a generator that can be used to quickly create Express application. The generator can be installed using
![]()
The "-g" option above makes the generator install as a global package. Once the generator is installed, create the skeleton for the application by running
![]()
The "-e" option above adds "ejs" engine support. The above command should create a folder “firstExpressApplication”. When you navigate into the folder you can see the skeleton of the application. It will have the following:
Files :
- app.js: This is the configuration file for the Express application.
- package.json : This file stores the packages that the application is going to utilize.
Folders:
- bin: Contains the file www that can be execute to launch the application.
- public: Folder to store static files like images, css and client-side javascript.
- routes: Middleware containing files defining various URIs of the application.
- views: Contains Embedded Javascript files (.ejs) files for the creation of front end.
The skeleton application relies on certain packages defined in package.json file that need to be installed. In order to install them run the following command
![]()
Step 3. Run the Application
The first two steps created the basic application. The application can be launched by running
![]()
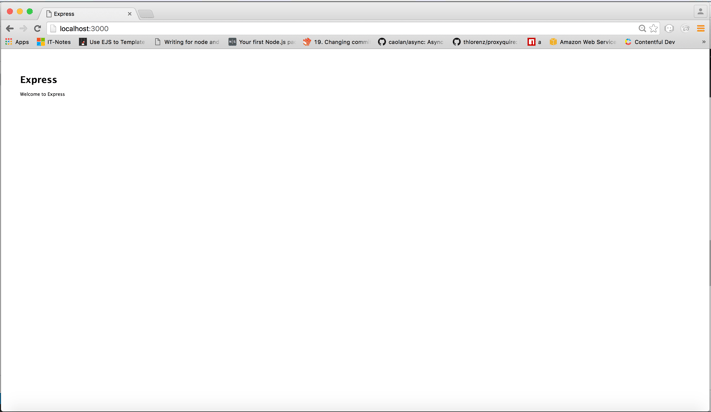
By default, the application is assigned to use port 3000. Once the above command is executed, open any browser and type the URL "localhost:3000".
It should open the default page that looks like the following.
By following just these 3 basic steps, you now have a functioning NodeJS application. To learn about how Agile Trailblazers can deliver working software, check out our Agile Software Delivery page.
