INTRODUCTION:
Apache Mesos is a kernel for the datacenter. It provides APIs for resource management and scheduling. Marathon is a framework for Apache Mesos and provides a scheduler to execute tasks on Mesos slaves. In this blog, we will be providing 5 steps on how to launch a simple application on a single Ubuntu 16.04 LTS machine in Amazon Web Services(AWS) using both these tools.
Step 1: Install Zookeeper
For the installation, it is assumed that an Elastic Cloud Compute (EC2) instance with a public IP address is already created using Ubuntu’s 16.04 LTS Amazon Machine Image (AMI). It is also assumed that the following ports are already opened in Security Groups and/or firewalls for that instance.
- 5050: To access Apache Mesos Master
- 5051: To access Apache Mesos Slave
- 8080: To access Marathon
After ssh into the EC2, we will run the following two commands to install zookeeper.
sudo apt-get -y update
 sudo apt-get -y install zookeeperd
Note that by installing zookeeperd, we will get both; the init control scripts and the zookeeper itself. We can confirm that installation went fine by running
sudo service zookeeper statusand seeing that zookeeper is active (running)

Step 2: Install Apache Mesos
In order to install mesos, we need to first add Mesosphere official package repository in our instance’s source list directory. This is achieved by running the following commands:
First we need to setup the key.
sudo apt-key adv --keyserver keyserver.ubuntu.com --recv E56151BF
 DISTRO=$(lsb_release -is | tr '[:upper:]' '[:lower:]')
 CODENAME=$(lsb_release -cs)
echo "deb http://repos.mesosphere.com/${DISTRO} ${CODENAME} main" | sudo tee /etc/apt/sources.list.d/mesosphere.listWe can confirm that the file mesosphere.list exists in /etc/apt/sources.list.d directory with contents along the lines of
deb http://repos.mesosphere.com/ubuntu xenial mainNow we can install Mesos by
sudo apt-get -y update
sudo apt-get -y install mesos
Step 3: Start Master and Slave Services
We need to make sure that Mesos master and slave can be accessed via their public IP address. For that purpose we will go and create the file advertise_ip in two locations:
- /etc/mesos-master
- /etc/mesos-slave
In both locations make sure that the content of advertise_ip should be the public IP address of the EC2 instance. This can be achieved by
 echo xxx.xxx.xxx.xxx | sudo tee /etc/mesos-master/advertise_ip
 echo xxx.xxx.xxx.xxx | sudo tee /etc/mesos-slave/advertise_ip
where xxx.xxx.xxx.xxx is the public IP address of the instance.
Now let’s start the master service first
sudo service mesos-master startand then start slave service
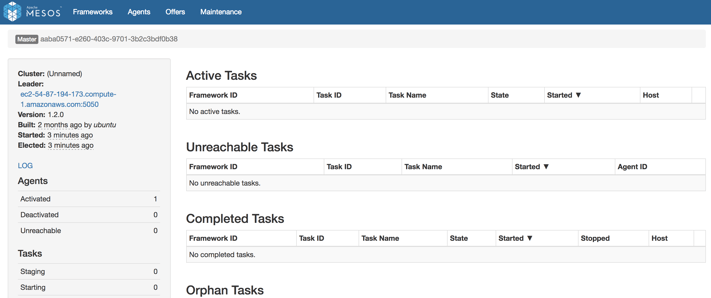
sudo service mesos-slave startAt this point we should be able to navigate, via a web browser, to the instance’s public IP and port 5050. We will see the Mesos GUI similar to the one below. Notice the count against Activated Agents is 1.

Step 4: Install Marathon
Marathon is one of the frameworks for Apache Mesos. We can use it to deploy code on Mesos cluster. In order to install it we run
sudo apt-get install -y marathonand then start the service
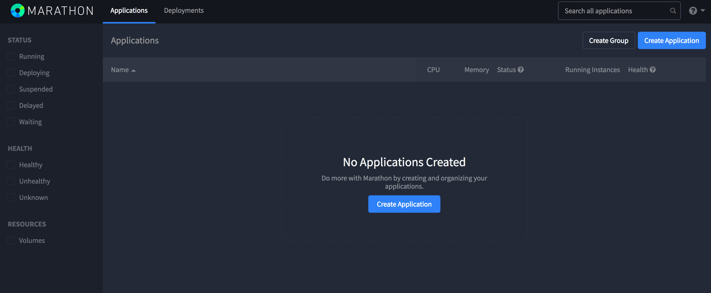
sudo service marathon startBy default, Marathon runs of port 8080. By pointing the browser to public IP address and port 8080, we can access its GUI.

Step 5: Deploy Application
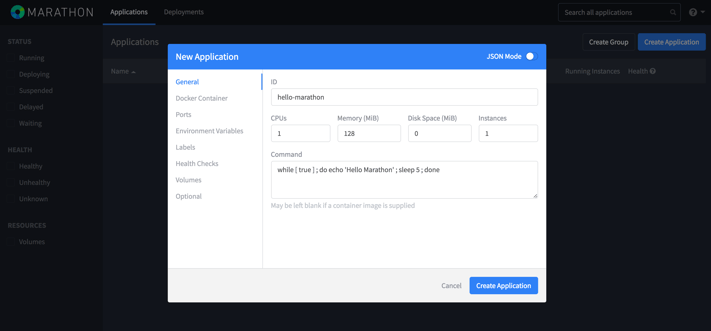
We can deploy a simple application. Click the ‘Create Application’. Then on the pop up window for ID type
hello-marathonand for Command
while [ true ] ; do echo 'Hello Marathon' ; sleep 5 ; done
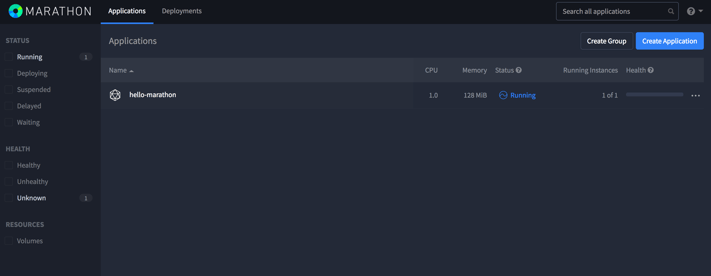
and then click the “Create Application”. We should see the application to start deploying and eventually running.

We can go back to the Mesos and see an Active task running

Once we click “Sandbox” for this task and click “stdout” we should see "Hello Marathon" to be printed there.
CONCLUSION:
5 simple steps were provided on how to deploy code in AWS using Mesos and Marathon. The keys are
- To make sure zookeeper is installed first. Mesos installation should take care of this dependency, but on Ubuntu 16.04 LTS zookeeper service doesn't work if it is not installed separately first.
- That security groups/firewalls are properly configured, otherwise we won't be able to access the instance from outside AWS.
- that public IP address of the instance is advertised for both master and slaves. Otherwise we may be able to access the tools from outside AWS, but the links shown in Mesos and Marathon will be internal AWS links and won't work properly from outside of AWS.
To learn about how Agile Trailblazers can deliver working software, check out our Agile Software Delivery page.
Learn more about modernized technology here:
Interested in training to help advance your agile journey? Click the button to view our current list of public training courses! Use code BLOG10 for 10% off!


